SCINet Setup Instructions
I have created a shared project space on the Ceres computing cluster run by USDA ARS SCINet, that I use to host all statistics and data science training sessions. You can run the R code on RStudio Server using Ceres OnDemand without installing anything on your own computer. Here are instructions for how to do that. First, if you do not yet have a SCINet account, you’ll need to register for one. Then, the first time you start an RStudio Server session on SCINet, you’ll need to copy the RStudio project files from a shared folder to your own personal directory. After that, whenever you start an RStudio Server session on SCINet and open the RStudio project for the workshop, you will have access to all the code worksheets and example data, and all needed packages and software will be ready to go.
Note: the screenshots and text below assume the project directory name is
MS2026but it will be different depending on which workshop you are participating in. Substitute the appropriate directory name everywhere it saysMS2026below in these instructions.
Register for a SCINet account
You will need to register for a SCINet account if you do not already have one, free of charge. You can do this even if you’re not a USDA employee as long as you have someone in ARS act as your sponsor. Important - this may take a week or two, so please start the process well before the workshop! Then provide Quentin with your username and he will add you to the shared project space. During the workshop, you will create RStudio Server sessions on Ceres OnDemand and run code from there.
How to start an RStudio Server session on Ceres OnDemand
You will need to do this the first time you log in to copy the project files over, and also every subsequent time you start a session on the day(s) of the workshop.
- Navigate to Ceres OnDemand and sign in with your credentials.
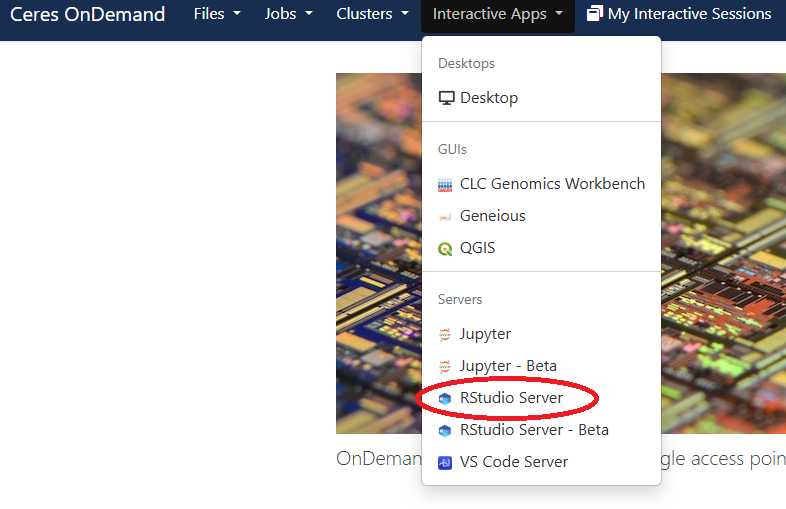
- Select “RStudio Server” from the Interactive Apps dropdown menu at the top of the screen.
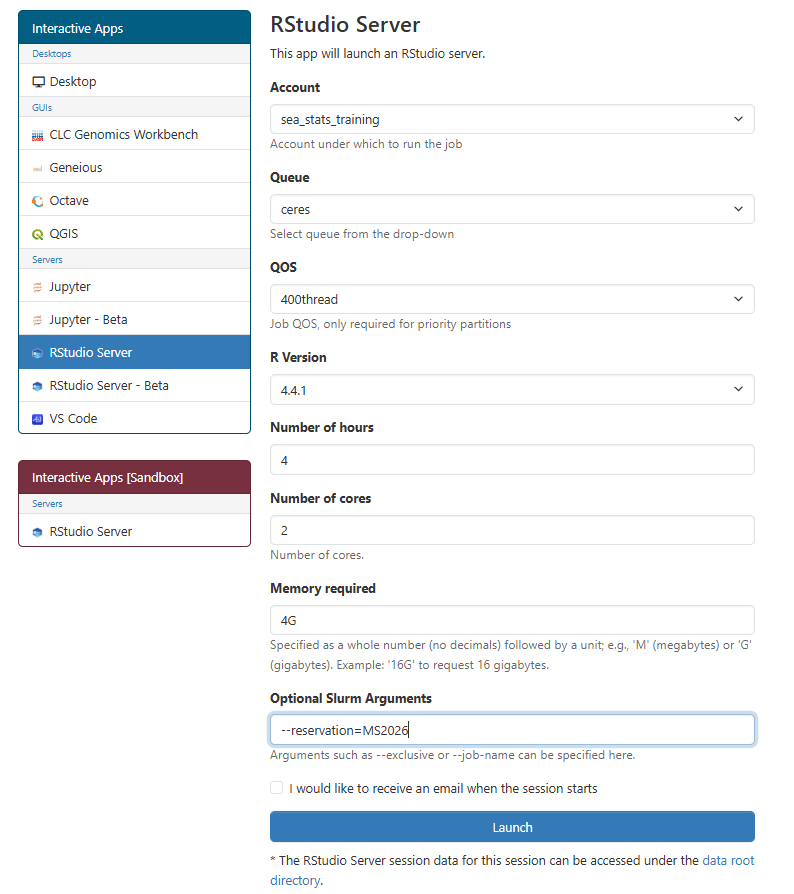
- Start a new job with the following options:
- Project:
sea_stats_training - Queue:
ceres - QOS: (you can ignore this one)
- R version:
4.4.1 - Number of hours:
4or enough to ensure the job won’t be killed during today’s lesson - Number of cores:
2(in some workshops, more may be needed) - Memory required:
4G(in some workshops, more may be needed) - Optional Slurm arguments: On the day of the workshop, I will give you a reservation code to put in this box which will ensure that your job will be run on the server nodes that have been reserved for the workshop. Otherwise, leave this box blank.
- Project:
- The job will be queued up and should start within a few seconds. When it starts, a button saying “Connect to RStudio Server” will appear. Click on the button to connect.
| Screenshot - selecting RStudio Server from OnDemand dropdown | Screenshot - options for new RStudio Server session |
|---|---|
 |
 |
Initial configuration steps
This is how to copy all the project files from a shared directory to your own personal directory. You will only need to do this part the first time you log in to SCINet. There is a directory on a shared space that all workshop participants have access to, /project/sea_stats_training/MS2026. This directory has all the example data, worksheets, and pre-fit model objects needed for the workshop. You need to first create a directory on the /90daydata space for all your workshop-associated files. Then copy this directory from the shared space into your workshop directory as follows:
In RStudio Server, select the “Terminal” tab on the left pane. Enter the following commands into the terminal. By the way, you do not need to change the $USER part because it will substitute your username.
mkdir -p /90daydata/shared/$USER/MS2026
cp -r /project/sea_stats_training/MS2026 /90daydata/shared/$USER
The copying should take only a few seconds (possibly longer for some workshops). Now you have a workshop folder in /90daydata called MS2026 that has everything you need in it!
Files on /90daydata, as the name indicates, are deleted if they are not used for 90 days. After the workshop, you may want to copy files to a permanent location.
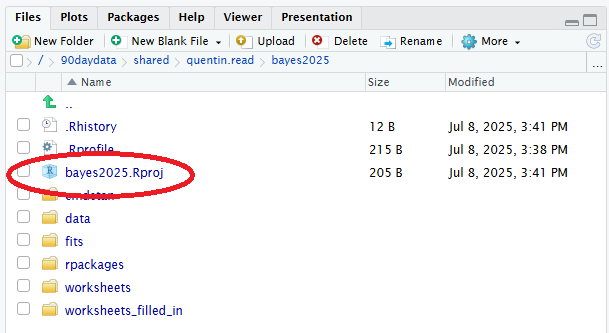
Opening the RStudio project
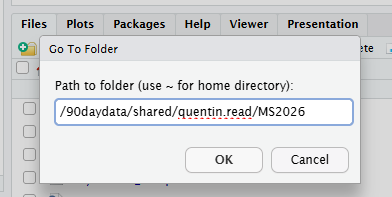
Once the files have copied, navigate to the /90daydata/shared/$USER/MS2026 folder in the Files tab in RStudio Server. Do this by clicking on the button with three dots in the upper right corner of the Files tab. This time you will need to enter your actual username in the file path, replacing $USER. Click the file MS2026.Rproj to open the MS2026 RStudio project. This will open the project and automatically configure RStudio to be able to access the installed R packages. It will also point you to the folder that contains all the worksheets you will need to participate in the lessons. You are good to go!
| Screenshot - entering copy command into RStudio Server terminal | Screenshot - clicking button to go to directory in RStudio “Files” tab |
|---|---|
 |
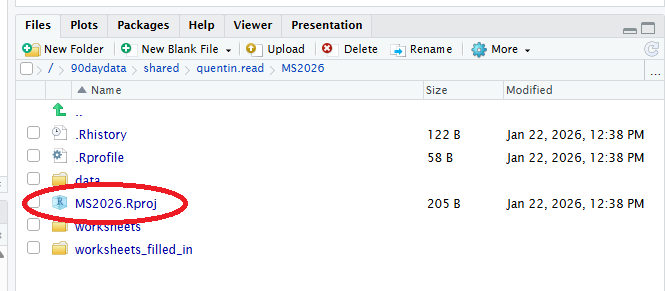 |
| Screenshot - navigating to MS2026 directory in “Go to Directory” dialog | Screenshot - opening RStudio project from Files tab |
|---|---|
 |
 |