February 2026 Statistics Training: Oxford & Stoneville, MS
I’m excited to be doing the first in-person area statistician location visit in quite some time! I will be spending much of my time on location consulting with researchers, but each day I will be offering a seminar or workshop open to everyone on location. I will also have a Teams option available so that people from both locations can participate in all workshops.
- Pre-workshop instructions
- Agendas and materials for each day
- Post-workshop survey
Pre-workshop instructions
You have two options for following along with the code in the workshops. Click on an option to expand instructions.
Option 1: Run code on SCINet

Option 1 - SCINet: I have created a shared project space on the Ceres computing cluster run by USDA ARS SCINet. You can run the R code on RStudio Server using Ceres OnDemand without installing anything on your own computer. You will need to register for a SCINet account if you do not already have one, free of charge. You can do this even if you’re not a USDA employee as long as you have someone in ARS act as your sponsor. Important - this may take a week or two, so please start the process well before the workshop! Then provide Quentin with your username and he will add you to the shared project space. During the workshop, you will create RStudio Server sessions on Ceres OnDemand and run code from there.
How to start an RStudio Server session on Ceres OnDemand
You will need to do this each time.
- Navigate to Ceres OnDemand and sign in with your credentials.
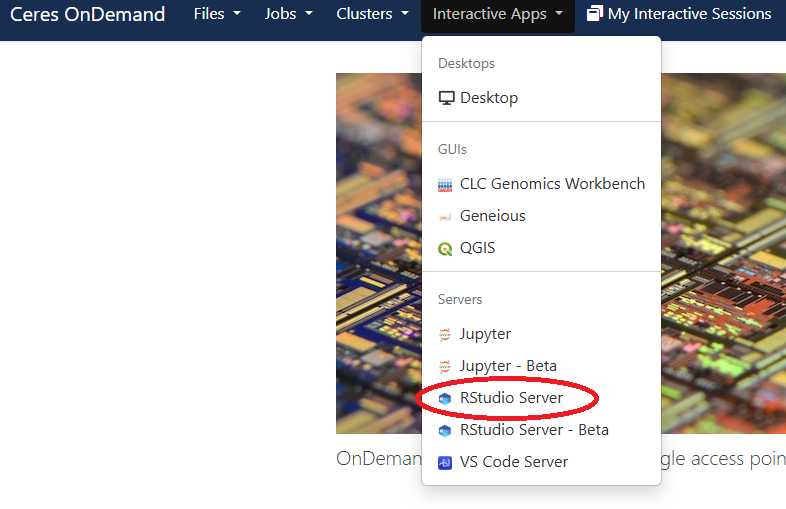
- Select RStudio Server from the Interactive Apps dropdown menu at the top of the screen.
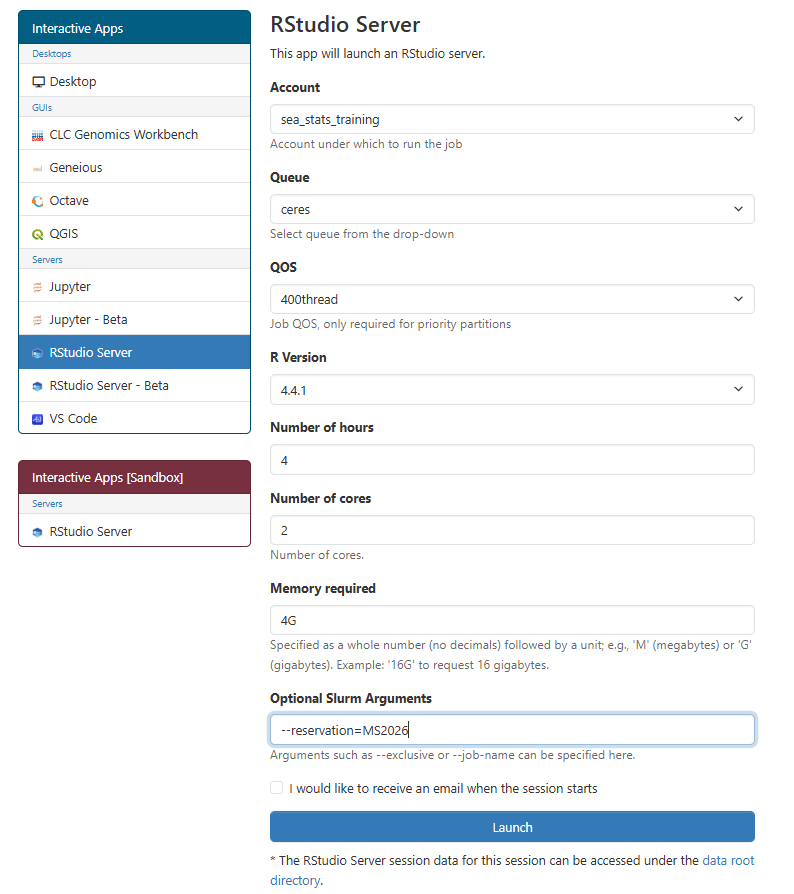
- Start a new job with the following options:
- Project:
sea_stats_training - Queue:
ceres - QOS: (you can ignore this one)
- R version:
4.4.1 - Number of hours:
4or enough to ensure the job won’t be killed during today’s lesson - Number of cores:
2should be more than enough - Memory required:
4Gshould be more than enough - Optional Slurm arguments:
--reservation=MS2026means the job will run on a cluster node that is reserved for this workshop, so we don’t have to wait for our sessions to start. IMPORTANT NOTE: The reservation is only valid on the days of the workshop. If you want to start a session on a different day, please do not include anything in the Optional Slurm arguments box!
- Project:
- The job will be queued up and should start immediately. When it starts click the “Connect to RStudio Server” button.
Screenshot - selecting RStudio Server from OnDemand dropdown
Screenshot - options for new RStudio Server session
Initial configuration steps
You will only need to do this once. There is a directory on a shared space that all workshop participants have access to, /project/sea_stats_training/MS2026. This directory has all the example data, worksheets, and pre-fit model objects needed for the workshop. You need to first create a directory on the /90daydata space for all your workshop-associated files. Then copy this directory from the shared space into your workshop directory as follows:
In RStudio Server, select the “Terminal” tab on the left pane. Enter the following commands into the terminal. By the way, you do not need to change the $USER part because it will substitute your username.
mkdir -p /90daydata/shared/$USER/MS2026
cp -r /project/sea_stats_training/MS2026 /90daydata/shared/$USER
The copying should take only a few seconds. Now you have a workshop folder in 90daydata called MS2026 that has everything you need in it!
Opening the MS2026 RStudio project
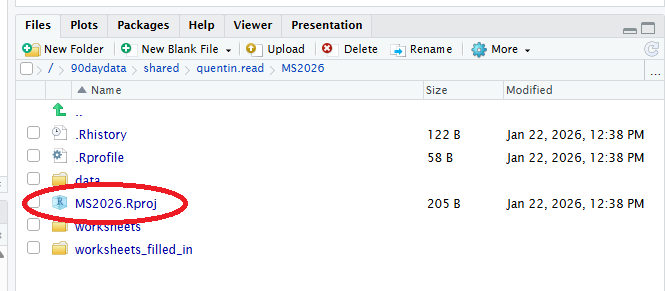
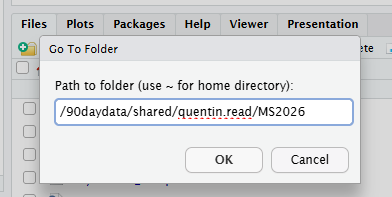
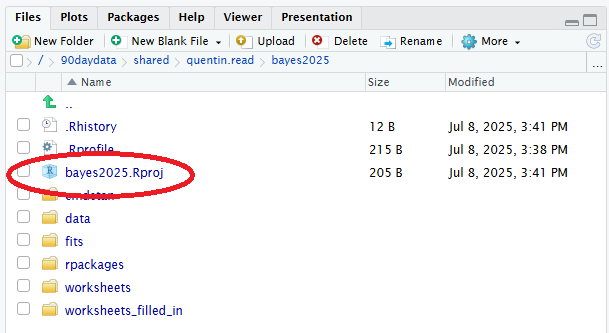
Once the files have copied, navigate to the /90daydata/shared/$USER/MS2026 folder in the Files tab in RStudio Server. Do this by clicking on the button with three dots in the upper right corner of the Files tab. This time you will need to enter your actual username in the file path, replacing $USER. Click the file MS2026.Rproj to open the MS2026 RStudio project. This will open the project and automatically configure RStudio to be able to access the installed R packages. It will also point you to the folder that contains all the worksheets you will need to participate in the lessons. You are good to go!
Screenshot - entering copy command into RStudio Server terminal

Screenshot - clicking button to go to directory in RStudio “Files” tab
Screenshot - navigating to MS2026 directory in “Go to Directory” dialog
Screenshot - opening RStudio project from Files tab
Option 2: Install software and run code on your own local computer

Option 2 - Local computer: Install R, RStudio, and all necessary R packages on your own computer. We will not have time during the workshop to troubleshoot any installation issues that may arise. But you may find it more convenient in the long term to have access to all the software to fit models to your own data locally.
You’ll need to install the following software on your local machine.
- R (version 4.4 or higher)
- RStudio (optional but highly recommended)
- R packages
Follow these steps to install R, RStudio, and the needed R packages.
NOTE: You will need to be connected to the Internet to install this software.
Step 1. Install R
You will need to download R from The Comprehensive R Archive Network, or CRAN. If you are using an older version of R, please update to version 4.4 or higher.
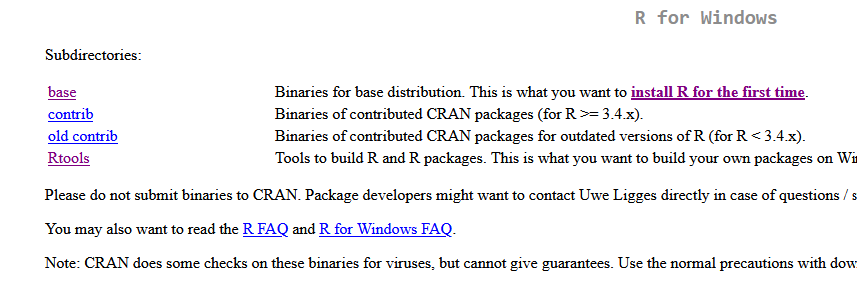
Go to the CRAN website and select the link to download the most recent version of R for your operating system. Follow the installation instructions.
Step 2. Install RStudio
RStudio is an additional software program that makes it easy for you to write R code. It provides an interface that lets you run code, edit scripts, see what variables are in your working environment, and manage files. RStudio is a program that makes it easier to use R, but you need to download both R and RStudio separately.
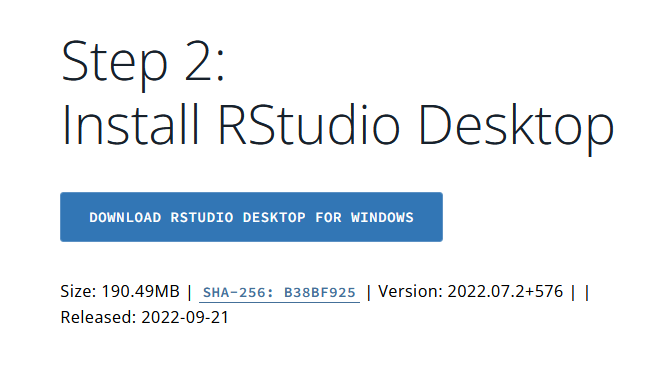
RStudio is now distributed by a company called Posit. Go to the RStudio Desktop download page and download the free version of RStudio Desktop. You will need admin rights to do this on your USDA machine.
Step 3. Install R packages
Run the following code in your R or RStudio console (copy and paste). This installs all R packages needed for the workshop.
install.packages(c('agridat', 'glmmTMB', 'tidyverse', 'emmeans', 'broom.mixed', 'brms', 'zoo', 'VIM', 'naniar', 'missForest', 'mice', 'randomForest', 'caret', 'ggcorrplot', 'patchwork', 'kernlab', 'glmnet'))
Step 4. Download the worksheet
Find the link to download the worksheet for today’s lesson further down on this page. Open it in R or RStudio to follow along with the code during the workshop. Good luck!
Workshop agenda and materials
All necessary data and code worksheets are already pre-loaded on the SCINet project space. I have posted all materials here as well, if people are running the code on their own machines or in case people want to access them after the workshop when the SCINet shared space is no longer available. You will need to bring your laptops to participate in hands-on sessions.
Day 1 (Tuesday, February 24): Oxford
9:00 AM - 12:30 PM: Hands-on workshop session, “Dealing with Missing Data” NSL Conference Room
Day 1 materials
- Dealing with missing data: Text version of lesson
- Slides version of lesson
- Worksheet (.R script) (Worksheet with blanks filled in)
- Answers to exercises
All data and worksheets are pre-loaded onto the SCINet server, but if you are working with your own local version of R you might need to download the data using the link below.
Day 2 (Wednesday, February 25): Stoneville
9:00 AM - 10:30 AM: Stats talk: Experimental design matters!, followed by Q&A JWDSRC, Main conference room
This is not a hands-on session. No need to bring your laptops today!
Day 3 (Thursday, February 26): Stoneville
9:00 AM - 12:30 PM: Hands-on workshop session, “Machine Learning Demystified” JWDSRC, Main conference room
Day 3 materials
- Machine Learning Demystified: text version of lesson
- Slides version of lesson
- Worksheet (.R script) / (Worksheet with blanks filled in)
- Answers to exercises
As before, all data and worksheets are already pre-loaded onto the SCINet server. Here are links to the example dataset files if you need them.
Post-workshop survey
Please help me improve future trainings by taking a quick (<5 minute) survey telling me what you thought about the workshops and talks!
Page last updated 2026-02-19